Working with large datasets on a cluster
Overview
Teaching: 15 min
Exercises: 0 minQuestions
Running Paraview on HPC systems
Objectives
Learn how Paraview works in client-server mode
Attention
This section will be a demonstration only.
You are not expected to recreate the tasks below during the lesson (unless you have a cluster handy). These have been tested on an ACENET cluster, and may need adaptation to work on other clusters. If you are technically-inclined, by all means do so; otherwise contact your system administrator.
Introduction
Here, we will see a demonstration of how Paraview can be run on an HPC system, using compute nodes to process the data, while being controlled from a desktop computer.
This involves running Paraview in what is called client-server mode.
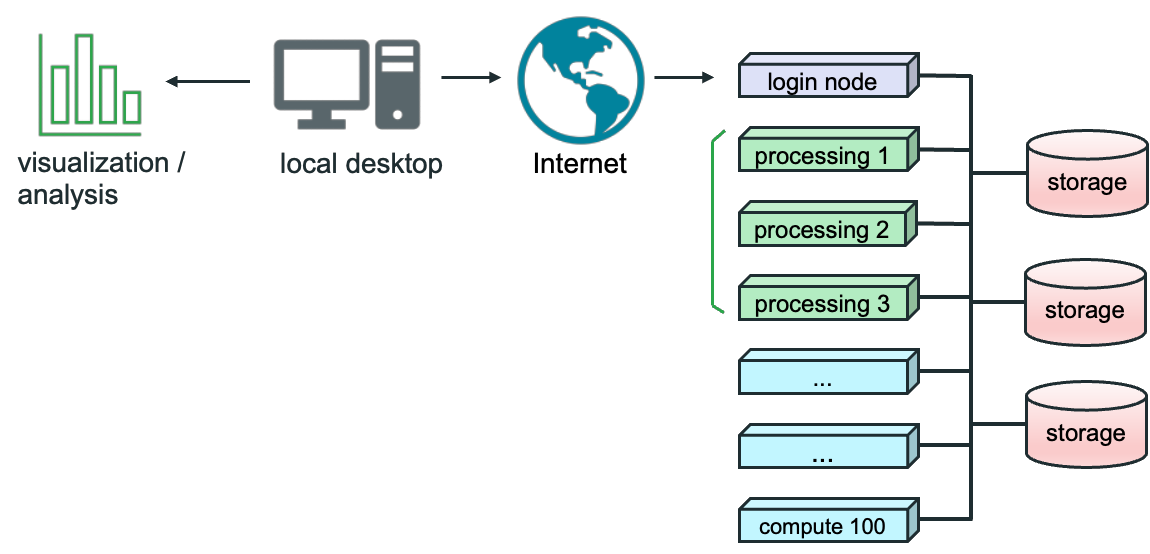
The diagram above shows how this works.
- The user on local desktop has the desktop version of Paraview.
- The server version of Paraview runs on the cluster, represented by the login and processing nodes on the right.
- The user connects to this through the Internet or local area network.
- Visualizations and data analysis are rendered on the user’s desktop.
Downloading and installing the Paraview on the cluster
The first task is to install headless mode Paraview on the HPC system you want to use. Headless mode means that this version of Paraview does not require a desktop, or even a graphics card. It is not designed for direct user interaction through a user interface; rather, it is designed as a server process which the user connects to with their own desktop Paraview.
On the Paraview download page, if you click on the Linux tab, you should see something similar to the following (may have to you scroll down slightly):
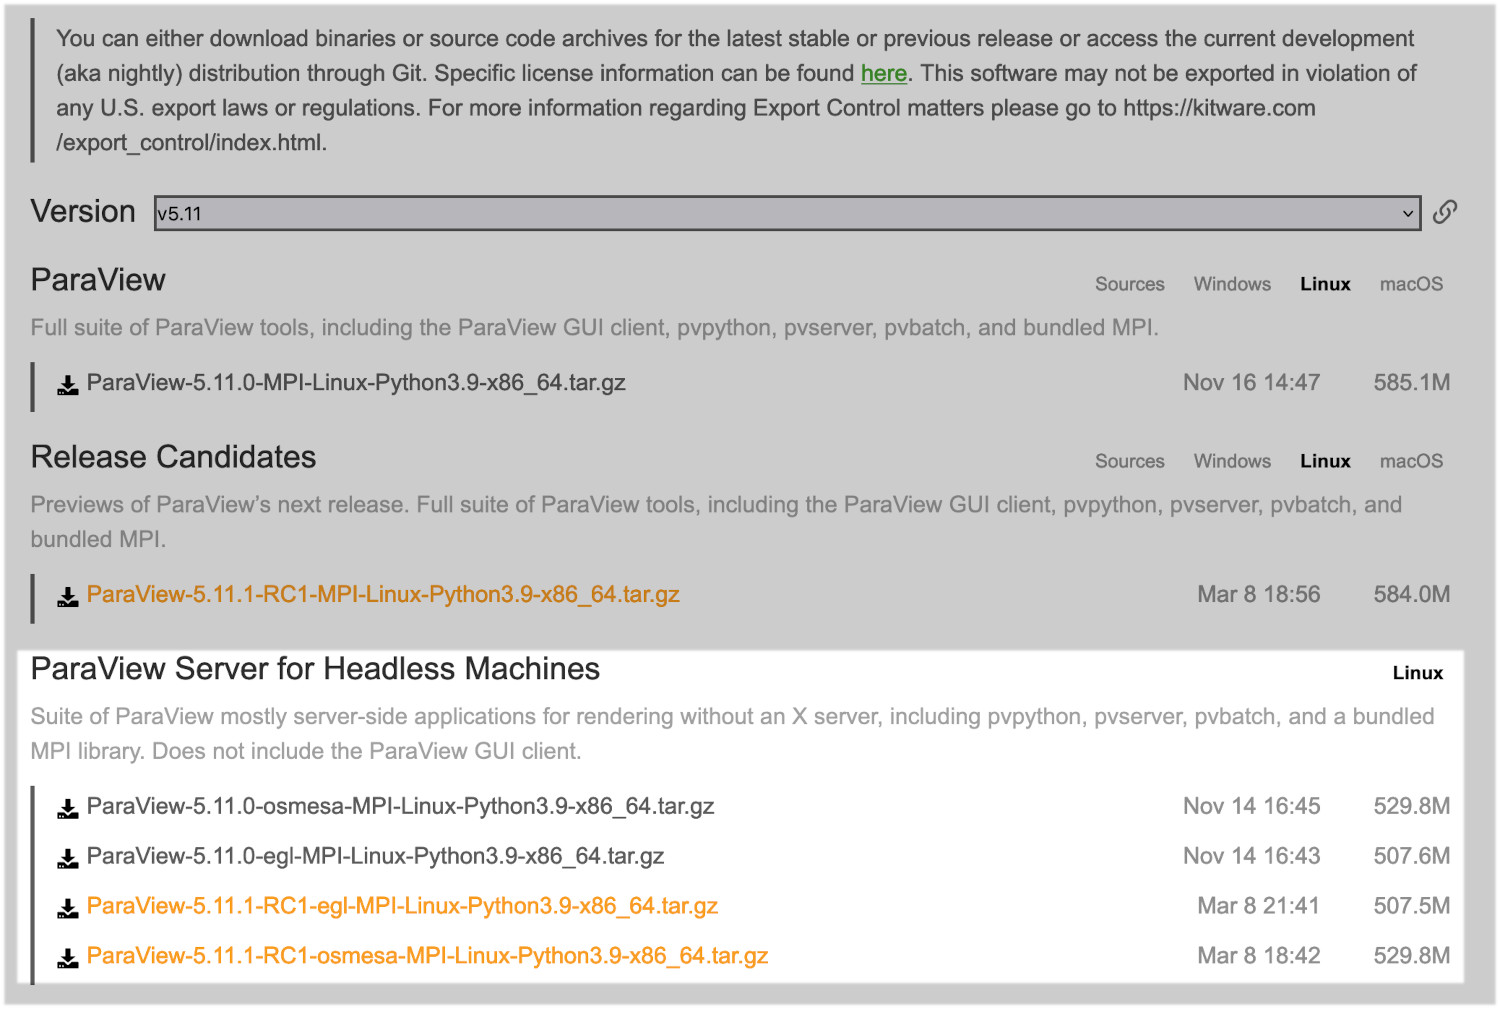
By default you should go for an osmesa version. This does not require a GPU to operate. If you have a cluster with GPUs, you can try an egl version. We will be using osmesa versions for this demonstration.
Once you have downloaded Paraview, extract the file archive where you can access it on the cluster. It can be installed under a user directory, as it does not need any special permssions.
Warning
The desktop and server version numbers of Paraview must be the same, otherwise Paraview will not work properly, if at all.
Running Paraview on the cluster
To run Paraview on an HPC cluster, you usually have to submit a batch job to the scheduler to run. This is what we will be doing here. Below is a simple Slurm batch script, which creates a job called ‘paraview’, which will run for 3 hours and uses 40 cores.
#!/bin/bash --login
#SBATCH --job-name=paraview
#SBATCH --time=3:0:0
#SBATCH --ntasks=40
#SBATCH --mem-per-cpu=2G
#SBATCH --output=para-%j.out
#SBATCH --error=para-%j.err

portnum=5002
paraver=5.10.1

echo "Starting Paraview headless servers on port $portnum"

paradir=$HOME/local/paraview/ParaView-5.10.1-osmesa-MPI-Linux-Python3.9-x86_64
parabin=$paradir/bin

export LD_LIBRARY_PATH=$paradir/lib/paraview-$paraver:$LD_LIBRARY_PATH
export PATH=$parabin:$PATH
export PYTHONPATH=$paradir/lib/paraview-$paraver/site-packages:$PYTHONPATH

srun $parabin/pvserver --force-offscreen-rendering --server-port=$portnum

echo "Paraview finished."
To adapt the Slurm script to your own cluster:
- In this case, we have installed Paraview under $HOME/local/paraview/ParaView-5.10.1-osmesa-MPI-Linux-Python3.9-x86_64. You may want to change paradir if you install to another directory.
- Change paraver to match the version you use.
- If 40 cores are insufficient, you may need to change ntasks to something larger.
- If you are not using Slurm as a scheduler, you will need to change the formatting, and the Slurm batch directives (#SBATCH).
- If your cluster has nodes with M cores each, make sure ntasks is a multiple of M.
We will be running on 40 cores, which is sufficient for many data sets. The Paraview server will be running on port number 5002.
Once that script is written to file (we will call it viz.slurm), then it is submitted to the scheduler with the command
sbatch viz.slurm
This will give the message Submitted batch job XXXX where XXXX is the job number. If we then run
squeue -u $USER
Then we can see if it is running. A message similar to this should appear:
          JOBID     USER      ACCOUNT           NAME  ST  TIME_LEFT NODES CPUS TRES_PER_N MIN_MEM NODELIST (REASON)
         431486  my_user        staff       paraview   R    2:59:58     1   40        N/A      2G cl005 (None)
This tells us that Paraview is running (the ‘R’ under State, or ST), and that I am using 1 node. The node here is given as cl005. This should be noted down, as it will be required in a moment.
Connecting to Paraview on the cluster
Before we can run Paraview on our desktop, we need to connect to the cluster with SSH, and with a SSH tunnel in place. The techniques here will work under Linux and MacOS, but need modification for use under Windows (eg. if using Putty).
What we are going to do is open a local port on our desktop, that connect directly to the compute node on the cluster where the Paraview server processes are running.
We do this (from our MacOS or Linux desktop) by issuing the following command at the terminal prompt
ssh my_user@cluster.address.ca -L 5002:cl060:5002
This opens port 5002 on our desktop, and pipes it to port 5002 on cl060 on the cluster. You will need to change this name to whatever node the scheduler has allocated your Paraview job to.
Now we can fire up Paraview on our desktop. If you select Connect under the File menu, you should see this dialog:
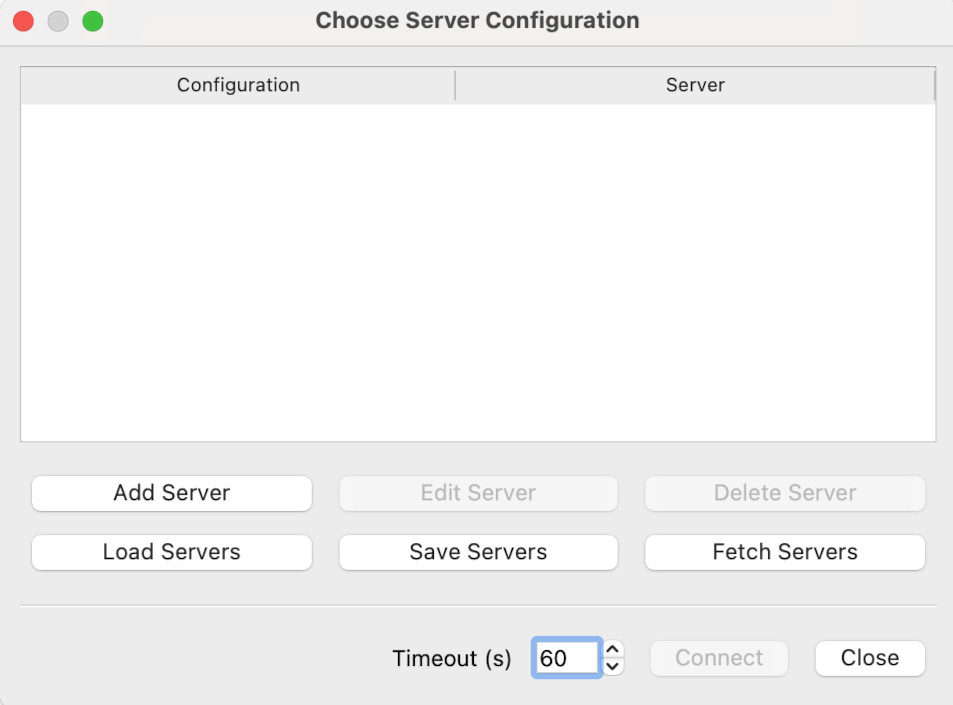
We want to click on Add Server. This will give the Edit Server Configuration dialog.
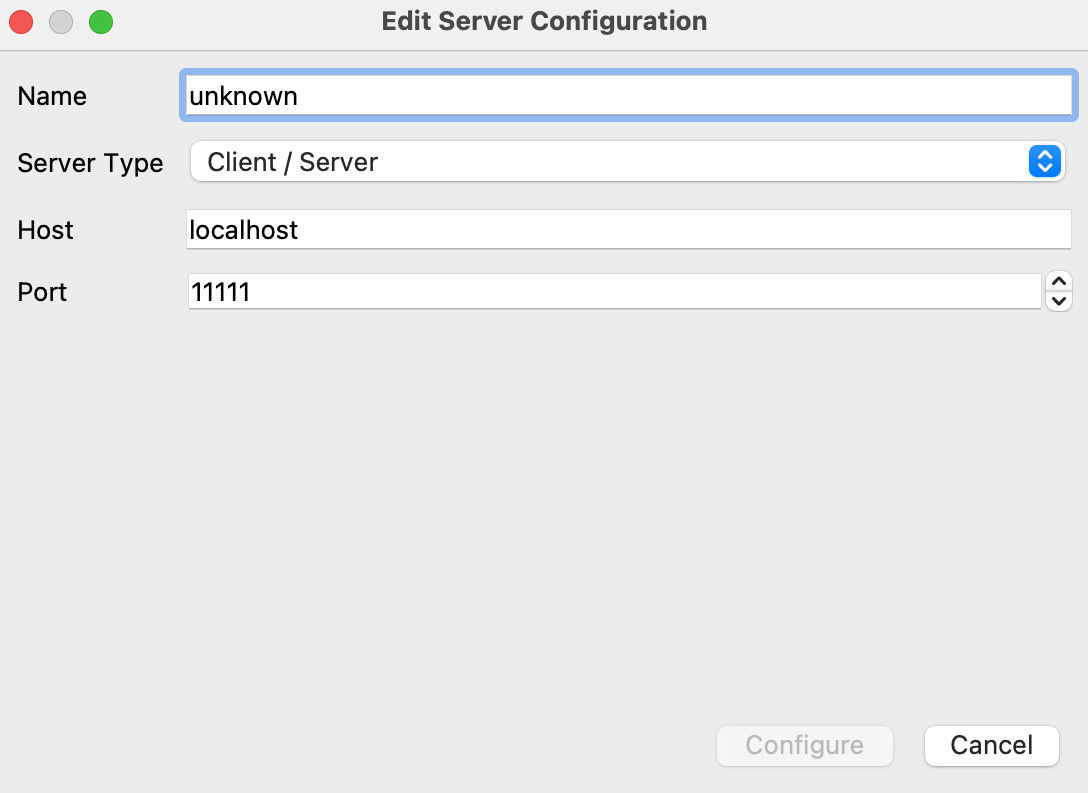
Change the name to something convenient, and the port to 5002, then click Configure. This gives a further dialog on launch options - just click Save. Now we can choose a server to connect to:
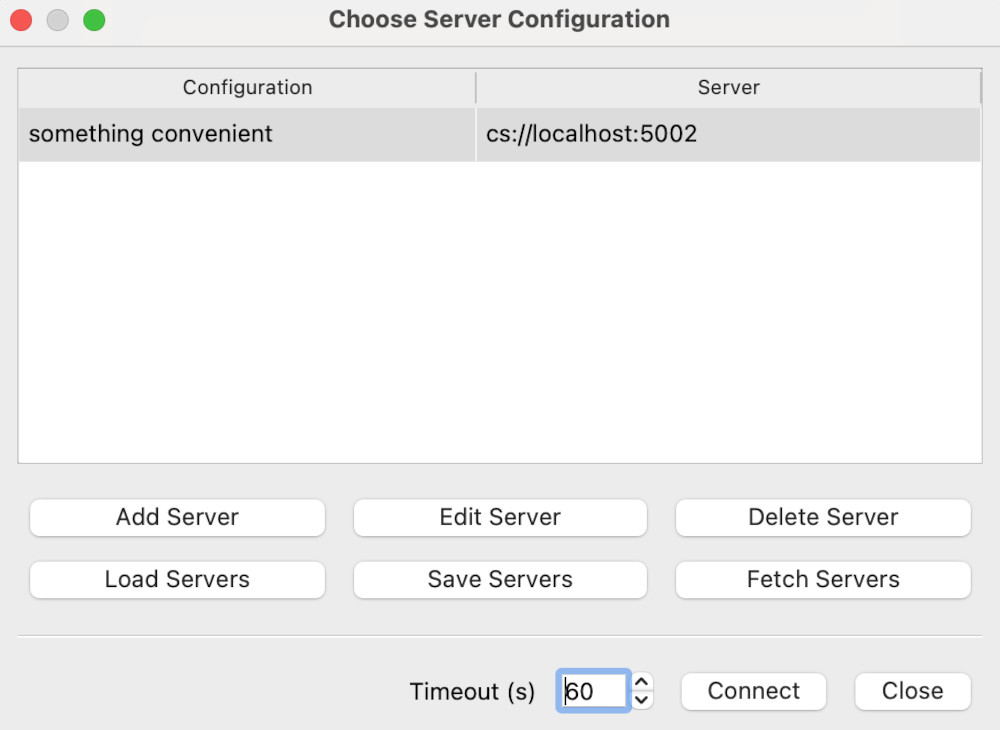
Here, we want to select the server connection we’ve just created, and hit Connect. This may take a few moments.
Once connected, you can open files within Paraview, apply filters and even export data exactly as if you were using Paraview only on your desktop.
Instructor demonstration
The instructor will conduct a short demonstration on using Paraview on a cluster. This will be using datasets much larger than can be conveniently processed on a desktop.
Key Points
Running Paraview in client/server mode allows remote visualization of large data sets.
The Paraview client connects to the Paraview server processes on the cluster.
The size of these datasets is only limited by server-side resources.